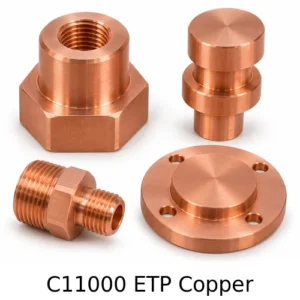
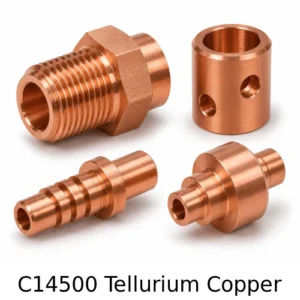
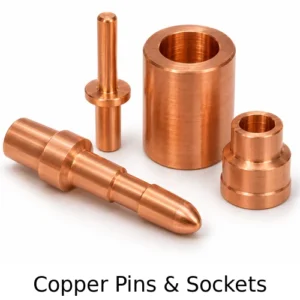
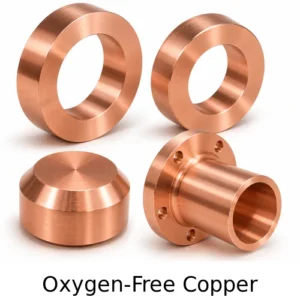
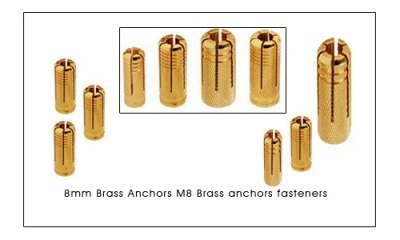
Copper CNC machined Sleeves and Copper spacers
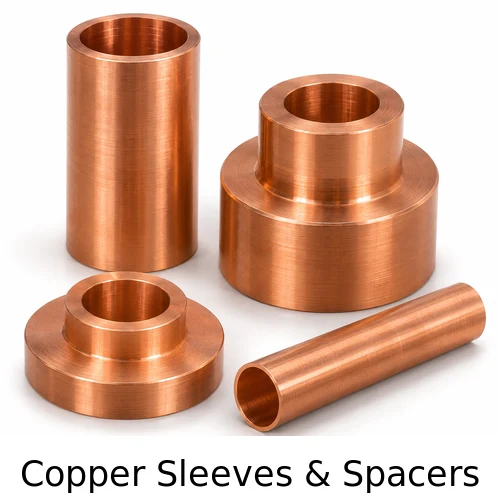
Rate: US$19.50 per kg
A turned copper sleeve may align a shaft, provide a conductive path, support an insulating component or set the height of a stack. Its drawing needs to identify which diameter guides the assembly and which end face establishes position. Conex Screws reviews cylindrical, stepped and flanged copper parts with a bored center. A complete enquiry includes the mating diameter, service environment and required finished length. For thin-wall components, explain whether the part is free during measurement or supported as it will be in service.
A spacer that carries compressive load needs a defined bearing area and compatible faces. A sleeve that guides a moving member needs an appropriate running fit and surface condition for that assembly. A collar that locates on a shaft may depend on a shoulder position, a clamping feature or a separate retention mechanism. These applications call for different dimensional and mechanical controls even when their nominal diameters look similar. The tables below help buyers identify which details to put on the drawing.
Turned sleeve and spacer forms
| Part or characteristic | Drawing and application details | Inspection and quoting considerations |
|---|---|---|
| Plain through-bored sleeve | Set the useful bore length and define the locating diameter. Identify whether the ends are interchangeable. | Inspect bore size over the actual working length, including taper when relevant. Check cutoff edges and bore exit condition. |
| Shouldered spacer | Dimension shoulder height and the installed stack length. Show any clearance needed for a mating fillet. | Identify the bearing faces and provide the required parallelism or perpendicularity to the locating axis. |
| Flanged collar | Define flange diameter and thickness, undercut and the corner clearance at the shaft or housing. | Measure the flange face from the locating datum and verify that the flange seats fully in the assembly. |
| Stepped bore spacer | State the effective depth of each bore, lead-in and pilot. Include the maximum mating reach. | Set inspection references for both diameters and the step face. Distinguish the cylindrical depth from the bottom drill shape. |
| Thin-wall copper sleeve | Define minimum wall, roundness and the measurement condition. Indicate whether the part is supported in a housing. | Check low-force measurement and allow the workpiece to relax after clamping. Use the agreed method for bore and outside diameter. |
Drawing features that prevent stack-up problems
| Part or characteristic | Drawing and application details | Inspection and quoting considerations |
|---|---|---|
| Stack height | Provide the individual part length, number of spacers and the intended assembled height range. | Trace the tolerance chain from the first seat to the final clamping face. Review worst-case stack where interference could stop assembly. |
| Bore and OD alignment | Identify the functional datum and specify the required geometric relationship using the agreed drawing standard. | Use the inspection approach appropriate to runout, position or wall uniformity. These measurements answer different assembly questions. |
| Wall thickness | State the minimum wall on stepped and offset areas when loading or fit depends on it. | Compare worst-case diameters and offset. Measure near transitions or features that remove stock from the same cross section. |
| Entry edge | Dimension the chamfer or radius where the sleeve is fed over a shaft, conductor or locating pilot. | Check insertion on a matching part or gauge when an abrupt edge could shave a soft member or damage plating. |
| Finish and flatness | Specify roughness where sliding or electrical contact demands it, and flatness or parallelism where faces carry load. | Use the correct method and direction for each surface. Finish requirements can vary between the bore, faces and outside diameter. |
Engineering questions for the first article
What is the difference between a sleeve, collar and spacer?
The terms describe function. A sleeve typically lines or guides around a shaft or bore. A collar typically locates or retains an assembly. A spacer fixes separation or stack height. A single stepped component can do more than one job, so the drawing should identify the controlling interfaces.
Can wall thickness be checked from OD and ID alone?
Half the difference gives nominal wall for a round, concentric section. The minimum local wall also depends on offset and shape. For a tight wall specification, identify which cross sections must be measured and how shape and alignment contribute to acceptance.
Why do thin sleeves sometimes measure differently after release?
Jaw pressure can deflect a thin wall during machining or inspection. When the pressure is released the geometry can change. A shared plan for support, fixture pressure and the final measurement condition makes the first article meaningful to both production and receiving teams.
Can a press-fit sleeve be inspected using the housing?
The assembly or a representative master can supplement dimensional inspection if the fit test is agreed. Supply the housing tolerance, material and assembly method. For an insertion force requirement, define the test speed, surface condition, temperature and permissible damage.
Example of a stepped sleeve wall check
Consider a sleeve with an outside diameter of 20.00 mm, an internal diameter of 16.00 mm and a nominally common axis. Its nominal radial wall is 2.00 mm. If the outside diameter can fall to 19.95 mm and the bore can rise to 16.10 mm, the corresponding concentric wall is 1.925 mm. If the bore axis can shift 0.10 mm relative to the outside, the minimum wall in that simplified section falls to 1.825 mm before allowing for form error. This is an illustrative calculation for a round section.
If a slot, groove or step crosses that section, evaluate the remaining wall from the final geometry. Give the minimum thickness by zone and identify whether the actual wall must be measured or may be verified through agreed dimensional checks. Where a housing compresses a thin sleeve during assembly, define the free-state and installed criteria separately so measuring a clamped sample does not conceal a condition that matters at receiving.
Example of a conductive spacer stack
A stack with three spacers of nominal length 8.00 mm has a nominal height of 24.00 mm before other components are included. If each spacer is allowed to vary by 0.05 mm in either direction, the worst-case sum for spacer length alone is 23.85 to 24.15 mm. Add the washers, contact bodies and housing steps to evaluate the full stack. Do not assume that every lot will center on nominal or that independent errors always cancel. Use the assembly’s real acceptance strategy to determine whether statistical or worst-case analysis is appropriate.
Face parallelism can influence clamping even when length is correct. If a spacer is loaded through one edge of a tilted face, the surface may mark or bed in during assembly. Identify the working diameter of the bearing face and any angular or flatness control it requires. If the sleeve carries current through the stack, document where coating is allowed and how the joint will be tested after clamping.
Plan for measurement of a thin-wall sleeve
A round sleeve can appear circular while held in a specific chuck position and show ovality after release. A common inspection agreement should identify orientation, support and measuring force. Measure on more than one axial plane if taper or local distortion can affect assembly. If the part will be installed in a precision housing, provide the housing tolerance and assembly method. A turned sleeve that passes in one hand-selected mate may still need a documented tolerance or gauge limit for interchangeable production.
Consider whether a surface that locates during machining is the same surface that locates the part in service. If the locating diameter changes at a step, document where the drawing axis is established. For a collar that seats against a shaft shoulder, check that the inside chamfer clears the shoulder fillet. A burr at the bore exit or a cutoff edge can change final seat depth without changing the measured major diameters.
Establish where a collar carries load
For a collar with a radial fastener, review thread engagement and the smallest wall under the flat or threaded hole. For a plain collar, identify the component that prevents axial movement and the clearance needed at installation. A spacer intended to conduct heat should have clearly marked bearing faces and an agreed finish. State the final assembly conditions before specifying a surface treatment, because contact behavior and corrosion exposure can point to different finishes.
How to prepare a drawing for quotation
Send a dimensioned PDF for acceptance and a STEP model for geometry review when available. Identify the current revision on both files. The PDF should distinguish basic, reference and toleranced dimensions, specify units and define precedence when the model and drawing disagree. Share the assembly context if the finished part seats against an insulator, mates with another copper piece or passes through an enclosure. The most valuable information is usually a section through the working axis and a note identifying the features that govern acceptance at receiving.
Mark the expected order quantity, lot size and annual demand separately. Production tooling, inspection and stock planning depend on how the demand is released. A batch of samples can qualify geometry before the full release. If the drawing changes between a sample and production order, state whether the earlier inspection report still applies and list the features affected by the change. Include any quality clauses that carry over to later releases.
Choose the stock specification and condition
A copper grade is a material designation. It does not specify all of the attributes of the starting stock. State the form, temper, material specification and revision required by the contract. Where the drawing cites ASTM B187/B187M for copper rod, bar or shapes, confirm that the grade and stock form are covered by the selected edition and scope. If stock is approved to a different standard, request engineering disposition before material is ordered. Separately identify the requirements for the finished component, including dimensional checks, coating and packaging.
A material test report is most useful when the receiving team can map it to the parts in a container. If traceability is contractual, define whether it must be maintained by heat, manufacturing lot or individual piece, and how identification will be applied. A bag or carton label can protect working surfaces from marking. A permanent stamp needs an approved location away from mating faces, thin walls and tight diameters.
Set up the turning sequence around the working interface
Turned features that share an axis may benefit from production in one setup. A long bore, slot or radial hole can still require an additional operation. Establish which relationships drive the setup before the machining plan is frozen. If a part must transfer to another chuck or a separate fixture, identify the gripping zone and the surface that re-establishes the location. Check whether a previously finished section must be protected against fixture marks.
A part drawing can leave the machining sequence to the supplier while preserving requirements for the result. For qualification, ask the supplier to explain how the operation sequence protects critical faces and how it will respond when tools wear or stock changes. Where sequence is contractual because of an approved special process, put that requirement on the purchase order and identify the conditions under which a change needs customer approval.
Specify bore geometry and tool access
On a blind hole, distinguish total drilled depth from the depth of full cylindrical diameter. If the hole contains a thread, specify full-form thread depth separately from the depth of drill point and thread runout. A counterbore or spotface should have its own dimension from the reference face. Deep narrow passages need sufficient access for measurement as well as for machining. If the application accepts the natural drill point, that allowance can help simplify inspection and production.
For a through bore, give the edge requirement at both ends. A raised burr on the exit face can prevent the part from seating and skew an assembly. If a radial passage intersects the axial bore, establish where the edges may be broken and which intersection surfaces must remain clear. Inspection may combine measurement of the passage with a visual or functional check for blocked flow or snagging, depending on the application.
Use thread callouts a buyer and inspector can verify
Use the thread series, nominal size, pitch and class from the drawing. Unified inch callouts can refer to ASME B1.1 as applicable. A metric M-profile callout uses a metric diameter and pitch and its own tolerance designation. State left-hand thread explicitly when required. For an unusual thread, supply the mating drawing or master and the acceptance method. A drawing that shows only nominal diameter may leave incompatible threads looking interchangeable to a buyer.
Define usable engagement, the clearance at the end and the entry edge. On a blind tapped part, specify how much full-form thread is needed ahead of the runout. On an external stud-like feature, verify that a relief groove does not remove a length needed for engagement. Standard thread gauges check the aspects of the thread covered by their design. Where an installed shoulder or a mating member with its own runout limits travel, add a functional fit check to the inspection plan.
Compare turned surfaces, finish and edge treatment
The surface roughness requirement should identify the parameter, units and working area. When traces can run in more than one direction, specify the direction relevant to the function and the method if it is important for repeatability. Compare the desired finish with what the actual bearing surface or bore can accommodate. A small annular contact pad may leave limited space for an instrument trace, so agree the method before production.
Define where burrs are unacceptable and where edge rounding is constrained. A blanket edge break may be inappropriate on small grooves or edges that establish a working length. Show these as exceptions and identify safe handling edges where a normal chamfer is acceptable. Agree whether small surface marks are cosmetic or restricted by a functional requirement. A photographic limit sample can help clarify a finish specification when visual acceptance matters.
Plan coating around the finished part
Tin, silver and nickel can serve different functions. Specify the coating and any underlayer, thickness and areas to cover on the drawing. Call out surfaces that need masking, any limits on buildup or bridging, and areas used for rack contact if a witness mark matters. Report material and coating requirements separately so the ordering team can distinguish the base copper from the final surface. When the intended process is still being selected, describe the application and ask for an engineering review.
In a simple concentric bore with a uniform deposit on both opposing walls, a coating of thickness t on each wall reduces the diameter by approximately 2t. A corresponding outside diameter increases by about 2t. This geometric estimate assumes uniform coverage and simple cylindrical surfaces. A deep blind hole can plate unevenly, and threads require separate treatment of flank geometry and gauge fit. Verify the finished fit using the inspection method agreed for the drawing.
Agree how critical dimensions will be measured
The inspector needs the same functional datums as the design and assembly teams. Specify what establishes the axis, the face from which axial distances are measured and any feature that clocks a slot or hole. A datum setup should support the part without distorting it. For short or slender features, identify a practical checking method before committing to a tight dimensional tolerance. A dimension that can be machined reliably still needs a method that can distinguish conforming parts.
External diameters can be measured at selected planes, while bores may require plug gauges, internal measuring instruments or coordinate measurements. A go gauge confirms an acceptance condition within its design. It does not report the full bore profile. If taper, ovality, position or axial variation matters, put that geometric requirement on the drawing and agree how to check it. Document the inspection condition when temperature, measuring force or fixturing can change the readings.
First article and ongoing inspection
A first article is most useful when it comes from the intended production material and process route. Ask for a marked-up drawing with numbered characteristics and a report showing actual values for the agreed dimensional features. Give a separate row to any functional test, material verification or coating acceptance criterion. Review the lot certificate and finished inspection together so the identified sample can be tied to its stock and operation history.
Agree sampling and records before production. Identify any features subject to complete inspection, any dimensions to record at process intervals and the method for addressing a suspect batch. If process capability is requested, define the study conditions and the minimum data set. A first article shows an inspected sample at a point in time. Ongoing records and change control show whether the agreed process continues to deliver the same features during repeat orders.
Receiving and handling of machined copper parts
Decide how parts are cleaned after machining and after any coating. Bores, slots, blind recesses and intersecting holes can retain chips or processing fluid. Give a cleanliness test or an acceptance sample when the allowable condition is important. Define whether the supplier may use corrosion protection or whether the component will go directly into a customer cleaning, soldering or assembly step. Incompatible protective products can create additional preparation work at receiving.
Protect dimensions that are easy to mark or distort. Separate sharp projections from thin walls and keep the working faces from rubbing against one another. Discuss trays, dividers, individual sleeves or simple bulk packaging in light of the size, surface condition and handling route. Identify the lot, drawing revision, order number and quantity on the outer label when requested. Where the parts are supplied in groups for a matched assembly, give each group a distinct identifier.
Common RFQ questions
Can Conex Screws quote from a sample?
A physical sample can help identify the machining route, mating conditions and finish. Supply a drawing or approve a controlled drawing before production. Surface measurements on the sample may include wear, distortion or coating, so identify the accepted nominal values and state whether a replacement part must mate with legacy hardware.
Can I request both metric and inch information?
Yes. Use one unit system as the controlling dimension set and mark the other as reference where appropriate. An exact unit conversion can produce a precision that the original tolerance did not intend. Keep the thread family in its native designation. If the product goes into a mixed-unit assembly, share the mating drawing with the enquiry.
How are tolerances and lead time confirmed?
Review is based on grade, part geometry, tolerances, inspection, lot size and the stock or tooling needed for the order. Highlight the dimensions tied to assembly or electrical performance. Conex Screws can then review measurable acceptance methods, production sequence and lead time with the buyer at quotation.
How does the per-kilogram rate relate to ordering?
The listed rate for this product family is US$19.50 per kilogram. Send the drawing and requested quantity for a written quote that identifies the order basis, finish, inspection and shipping terms. If your purchasing system orders individual pieces, request the agreed piece-weight basis and price presentation for the quotation.
Can I specify a material grade different from the examples?
State the UNS designation, specification and temper and provide the target application. Quote review can check grade and stock availability, cutting access and inspection. Procurement should approve the exact designation against the drawing before any material is released.
Which checks apply before and after plating?
Use before-coating checks where they control machining or establish a baseline. Set finished-part acceptance against the agreed drawing and functional gauges. Where access is limited, agree coating measurement locations and test frequency at quote stage. Provide an approved mate for assembly-sensitive interfaces when useful.
What should a quote package include?
Provide the product drawing, revision, part quantity, target delivery, material grade and temper, critical tolerances, finish, packaging and any required reports. Include the mating drawing or assembly section if available. Attach any first article forms and identify requirements that have to be agreed before materials are procured.
Turn an assembly requirement into an inspection characteristic
Start with a sentence describing the risk. A part that stops short at assembly, rocks under a clamp or loses engagement during handling needs a different check in each case. Identify the feature in the drawing section that controls the outcome. Write its acceptance as a measurement with a datum or as a test with a controlled mating condition. Avoid a note that relies only on interpretation, such as asking for a good fit, when the requirement can be described in a drawing or test plan.
Create a short list of characteristics that govern release. Review them with the receiving team so the supplier knows which actual values and documents to include. A first article can document the relationship between related features, and ongoing checks can focus on the measurements likely to change during production. If a tolerance is changed in the drawing, record which master sample or gauge revision applies. When the fit depends on a downstream operation, agree whether the receiving inspection verifies an intermediate condition or the finished assembly.
Manufacturing and purchasing checklist
Before ordering, confirm that the drawing names the component and clearly identifies the part revision. Verify that the quotation records the same material and the same delivery condition. Ask for an approved sample or dimensional report if the geometry is new, if a new stock size must be sourced or if the same part number was previously ordered with a different finish. Include an approved deviation on the order when engineering has accepted an exception. Identify the point at which approval expires if the deviation applies only to samples.
Set the information required for future reorders. Preserve the drawing number, revision, material requirement and the inspection or packing conditions that define the part. Where samples use a process different from the intended production route, agree what evidence the production process needs before release. Where a surface has multiple requirements, identify their order of precedence and the areas to which they apply. This gives purchasing a repeatable order description and gives the incoming inspector a set of clear checks.
Define the finish and limits for visual acceptance
A finished machined surface may have normal turning marks visible under directional lighting. When appearance affects assembly or end customer acceptance, state the lighting, viewing area and permissible marks, or reference approved samples. On a concealed body, machining marks outside the working area may matter only where they create a burr or change the dimension. On a mating diameter or face, the same marks can affect seating or friction. Set the acceptance area on the drawing and identify any surfaces where contact from packing material is restricted.
Agree how witness marks are handled. A rack contact can leave a small mark after plating, and a fixture can mark a part during transfer. Restrict marks on the functional zone and establish any agreed acceptable areas before the process is approved. Keep the visual limits separate from quantitative checks for dimensions, roughness and coating thickness. When a part is intended to be further machined, specify which surfaces remain on the completed assembly and which are left as extra stock.
Material, thread and product references
- Copper ferrules and olives
- ASTM copper rod, bar and shapes specification
- ASME Unified inch screw thread standard
Send your drawing to Conex Screws
For a quotation, provide your drawing revision, material designation, finish, order quantity and any inspection documents. Include the mating geometry where fit matters. Conex Screws will review the manufacturing and acceptance requirements with your engineering or purchasing team.
Email your drawing for a quote at sales@conexscrews.com
Explore all Copper Screw Machine Parts and CNC Turned Components